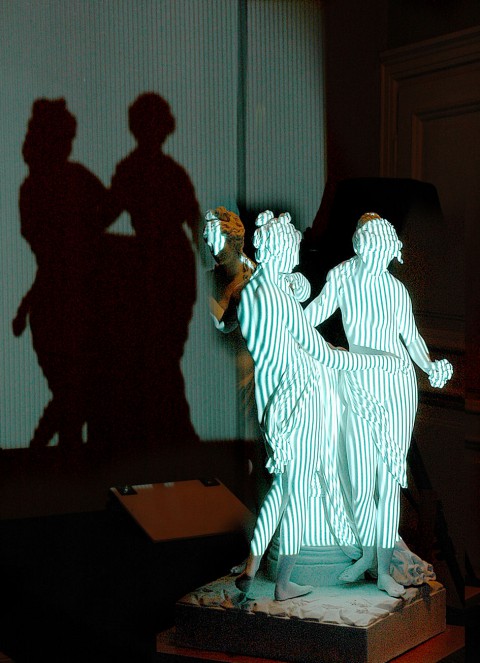
Accurate scanning for documentation purposes
In the fourth quarter of 2017, at the Museum of the Palace of King Jan III in Wilanów, the implementation of the task “Development of three-dimensional documentation of the collection” began. The task covers three areas of activity with completely different specificity, conducted on two completely different groups of objects.
The first concerns activities related to an immovable monument – the scanning of one of the palace interiors (The Queen's Antecabinet) and monitoring of ageing changes in selected points of the palace's façade. The second group is activities on moveable monuments – in the case of the work in this quarter, this will be three-dimensional documentation of four ceramic sculptures in the Wilanów bisque collection.
The Queen’s Antecabinet is a room with an area of 17.60 m2 and a height of 4.70 m. The wall and ceiling decorations date back to the 1830s and were created after the fire in 1732. Despite having such a wonderful object in the collection, the possibilities of making it available to visitors are very limited (during a visit to the museum, it is only possible to look into the room through the open door).
The system used for the purpose of interior documentation, uses a robot-controlled automatic measuring sequence. It allows for scanning the rich decoration of the room at a resolution of 0.1 millimetre between sampling points. The automatic positioning of the measuring system makes all the activities carried out safe for all the elements of the room.
The scanning system is equipped with additional LED lamps, thanks to which, together with the information collected on object geometry, colour information is also obtained (saved in RGB format), collected in shadeless conditions and with appropriately calibrated white balance. Such an accurate digital copy will enable the virtual presentation of this interior in the future.
The scanning of bisque sculptures, on the other hand, is carried out using innovative robotic measuring stations that enable the documentation of the surfaces with a resolution higher than 0.02 mm between sampling points. These stations allow for the precise positioning of the measuring head in relation to the object, so that the exhibit is not touched in any way during measurements. The measuring head uses the technique of structural light, i.e. it analyses the distortion of lines displayed on the object. Obtaining such precise data requires hundreds of directional measurements for one object. However, this is one of the most accurate results that can be obtained by using optical three-dimensional measurement methods.
The Museum employees responsible for the assessment of the ageing processes taking place on the surface of the façade under external conditions, have been considering the possibility of using modern measurement techniques for this purpose for years. For this project, twelve points on the elevation were selected and documentation will be carried out at a resolution of 0.02 mm between sampling points. This will allow even very minor changes to be detected if they occur. Analysis of the obtained data will make it possible to develop studies and methods of conservation work, which will allow for future detection of damages to the elevation in their early stages.

suggested

Painted decoration of the Etruscan Cabinet in the Wilanów Museum
Studia Wilanowskie, 1989 r. T. XI The Etruscan Cabinet, situated on the ground floor of the northern tower of the palace …


